
Gunner's Cap
 If'n you're not the captain, you still need somethin' to keep the
sun o' the tropics off yer pate. Deck hands and gunners need
something to keep their mangy manes back, and out of the workin's
of ropes and cannons. This gunner's cap is a tube pulled down to
the neck and pushed back up, then tied off with whate'er is handy.
Also it's a lot handier belowdecks where there's not room for that
big foofy cap the captian wears.
If'n you're not the captain, you still need somethin' to keep the
sun o' the tropics off yer pate. Deck hands and gunners need
something to keep their mangy manes back, and out of the workin's
of ropes and cannons. This gunner's cap is a tube pulled down to
the neck and pushed back up, then tied off with whate'er is handy.
Also it's a lot handier belowdecks where there's not room for that
big foofy cap the captian wears.
This be the British-pirate style. Iff'n ye be a frog pirate, make it in blue an red instead o' blue an white. Elsewise bein' a free thinkin' entrepreneurial sort I suppose there's no reason you can't make the stripes an sort of color combination you might like.
- Techniques needed:
- Longtail cast-on
- Knitting and purling in the round
- Joining colors
- Cast-off
- Icord or felting
- Tools needed
- 1 skein EACH (220 yards) blue and white yarn. (Wool, cotton, acrylic, whatever)
- 1 circular needle appropriate to the yarn, at least 24 inches long
- 1 stitch marker
- 1 tapestry needle
- 1 measuring tape
Directions:
Hat:
Knit a swatch at least three inches wide. Measure how many stitches are in each inch.
Measure the recipient's head, where the hatband will fall.
Using a long-tail cast-on* and the white yarn, cast on enough stitches to meet the head measurement. There should be no negative ease at this point. If this pattern stretches too much, the stripes look more like checkerboards. (for those not as wordy as Matey Didactic what that means is we want the hat to fit exact with no stretch because if it stretches the skiny stripes look dumb)
Join, being careful not to twist, and place a marker at the
start of the round.
Knit 6 rows in stst in the white.
Purl 1 row.
Knit 1 row in the white.
At the stitch marker, switch to the blue.
Continue knitting and alternating colors until the hat is as long
as you want it (double the distance from the hat band to the top of
the head).
Purl 1 row in the blue.
Knit 6 rows of the blue and cast off loosely.
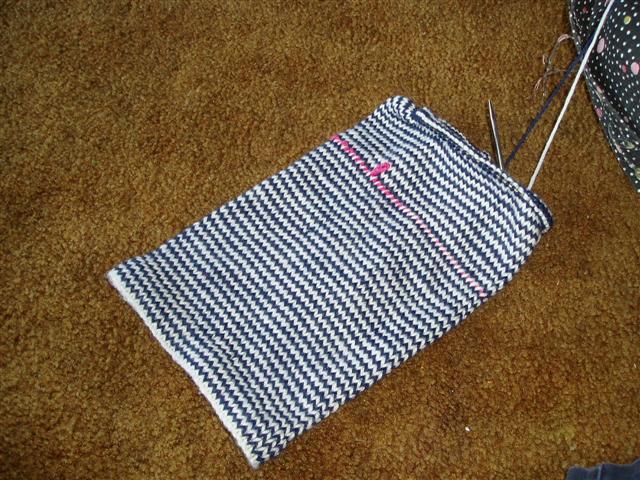
Look closely at both the inside and outside of the hat and decide which stripe appearance you want.
Turn the hat so that the stripes you want showing are on the
inside. 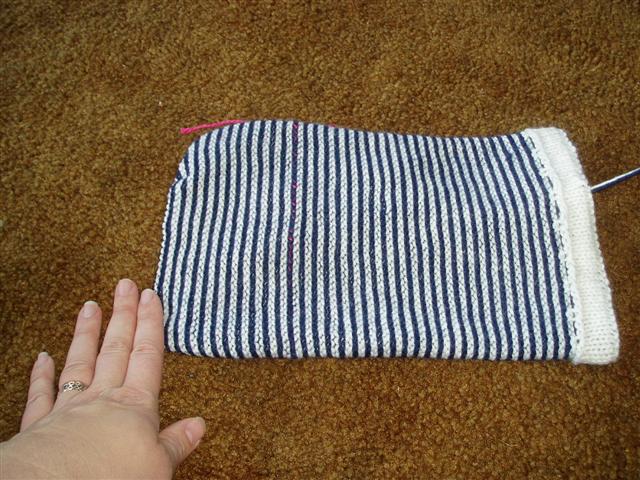
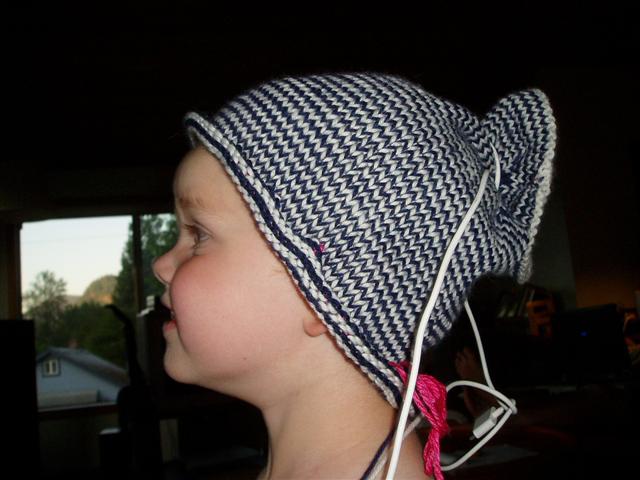
Here's one turned with the purl side out. That bit o' pink fancy
you see is where I took it off me needles and tried it on the cabin
girl in question. Just take a marlinspike or yarn needle,
whichever's handiest, and string some waste yarn through th' loops
on yer needle. Tie the ends in a knot, and pull the needle out, and
bob's yer uncle. When yer done fittin' to the swabbie, put it back
on yer needles an' keep goin'. (you can pull the pink bit out right
then or later when you're done)
Turn up the hems marked by the purl rows, and stitch them carefully to the inside of the hat, trying not to let the yarn show through. Make sure you don't sew so tightly that the stretchiness is harmed.
Weave in ends and block, if applicable.
Tie:
You could make an i-cord tie if you wanted. It should be about 18 inches long.
What ol' Matey Didactic did was take 9 pieces of yarn about 30 inches long, braided them, tied the ends, got the braid wet, and tossed it in the dryer with a load of laundry.
*Add an additional yard to the length of the tail. You will use this to sew up the brim.
Flat instructions:
Arrr! As we all know, the world be flat! And there be knitterly
folks out there who would be preferin' to knit in the flat.
- Modifications for knitting in the flat:
- Cast-on on straight needles.
- When you reach the desired length, cast off.
- Sew into a tube, using mattress stitch or other seaming method.
- Continue with hems as noted above.

Gunner's Cap Pattern by Laura Thomas & Heidi Waterhouse is licensed under a Creative Commons Attribution 3.0 United States License.
